Thursday, May 13, 2010

My Purse Mini Album Instructions


The instructions are now up on my Etsy shop CLICK HERE to go there directly. I wanted to make sure everything was correct before I put them up! If you have ordered a kit, you will be receiving them shortly.

Wednesday, May 12, 2010

It's What's Up Wednesday! for May 12, 2010

In keeping with the theme of using a repurposed gum box during last weeks Ustream Class... this week I made a...


Scrap Happy Meal!

I covered a 4 Piece Chicken Nuggets box and a French Fries box with patterned paper (similar to how I covered the gum box) to make a mini album in the box and and tag "fries" to go with it. Couldn't quite come up with the Mikshake...yet...give me time!!
Here's the whole mini and one of the tag "fries"


Have an awesome week!

Laura

I will be putting the Purse Mini Instructions and Templates up on Etsy tomorrow and emailing to all who ordered a kit! Whew! That was a LOT of kits to get out the door!!

Monday, May 10, 2010

Purse Mini Album Kits are UP!...Finally!!

The kits for the Purse Mini album that I will teaching on Ustream this coming Friday are FINALLY up on my Etsy site! CLICK HERE to go directly to my Etsy page.

I am still finishing the Instruction/Templates and will have them available on Etsy by Thursday. The price of the kits INCLUDE the instructions so don't purchase them separately. They will be available without the kits as well. They are sent via an email PDF for you to download and print. The instructions/templates include a supplies and materials list and will be needed to participate in the class on Friday.

Laura

Friday, May 7, 2010

Pajama Party Tonight!!

We 're having a PJ Party tonight on UStream! Wear your jammies, grab some popcorn, and bring a gum box and some scraps to make a Key Chain Mini for your favorite MOM!


What you will need (besides your usual scrappin" supplies):

-A gum box....I like the Orbitz brand, but I am checking out some of the others. "React" looks like it's going to work. "Stride" is going to work, it will be a bit more challenging... it's got a double pocket!
-Gesso or acrylic paint. I gesso the outside (especially the edges) to cover up the the packaging color. You can do this ahead of time so that it will be dry. You can gently "unassemble" the gum box to lay flat to paint.
-Paper and card stock to cover the box and for the tag inserts...use up your scraps!!
-Your favorite glue and adhesives
-A length of this ribbon or cord and an optional split key ring
-Any fun embellishments...they can't be too thick!

To go directly to my Ustream channel, CLICK HERE. We will start at 7pm PACIFIC time (That's 10 pm Eastern)

"See" you all tonight with my jammies and new slippers!!

Laura

Wednesday, May 5, 2010

It's What's Up Wednesday! for May 5, 2010

Here's some different flowers for Mother's Day....made out of metal!!!


To make these special roses just in time for Mother's Day, you will need Embossing Metal (it's kind of like REALLY heavy foil), a flower die (I used Tim Holtz's "Tattered Flowers" from Sizzix), and snips to cut metal (T!m's Tonic Scissors....my fav!).


These flowers are made similar to the method T!m uses on his blog (look under 12 Tags of Christmas 2009). Cut 3 flowers from the die cut. Snip petals towards center.


Roll he petals around a small round object like a paint brush handle or whatever you have handy. Don't roll too tight!


Gently fold petals in halfish. USE EXTREME CARE! The metal edges can be sharp!!


To make the center of the flower, fold 3 of the petals towards the center, folding around each other to form the bud-like center. Fold the remaining 3 petals up around the inside petals.


Repeat the roll, fold, and form the petals with the other 2 flower parts, allowing space in the center to stack the previous sections.


To "age" the metal so that it isn't quite so shiny and new, you can use a kitchen torch (found at kitchen supply stores for Creme' Brulee') Again, use EXTREME CAUTION!! The torch is significantly hotter that you heat gun (your heat gun won't get hot enough to do this!) DO NOT TOUCH the metal after you torch it....quench it in cold water wit a pair of tweezers before you touch it!!!


This photo shows how the torch takes the shine off the brass. With copper you can get a rainbow effect of colors!! The aluminum doesn't really do anything.


Stack and adhere sections together to form complete flower (I used glue dots!) To make smaller flowers, use only two flower sections.

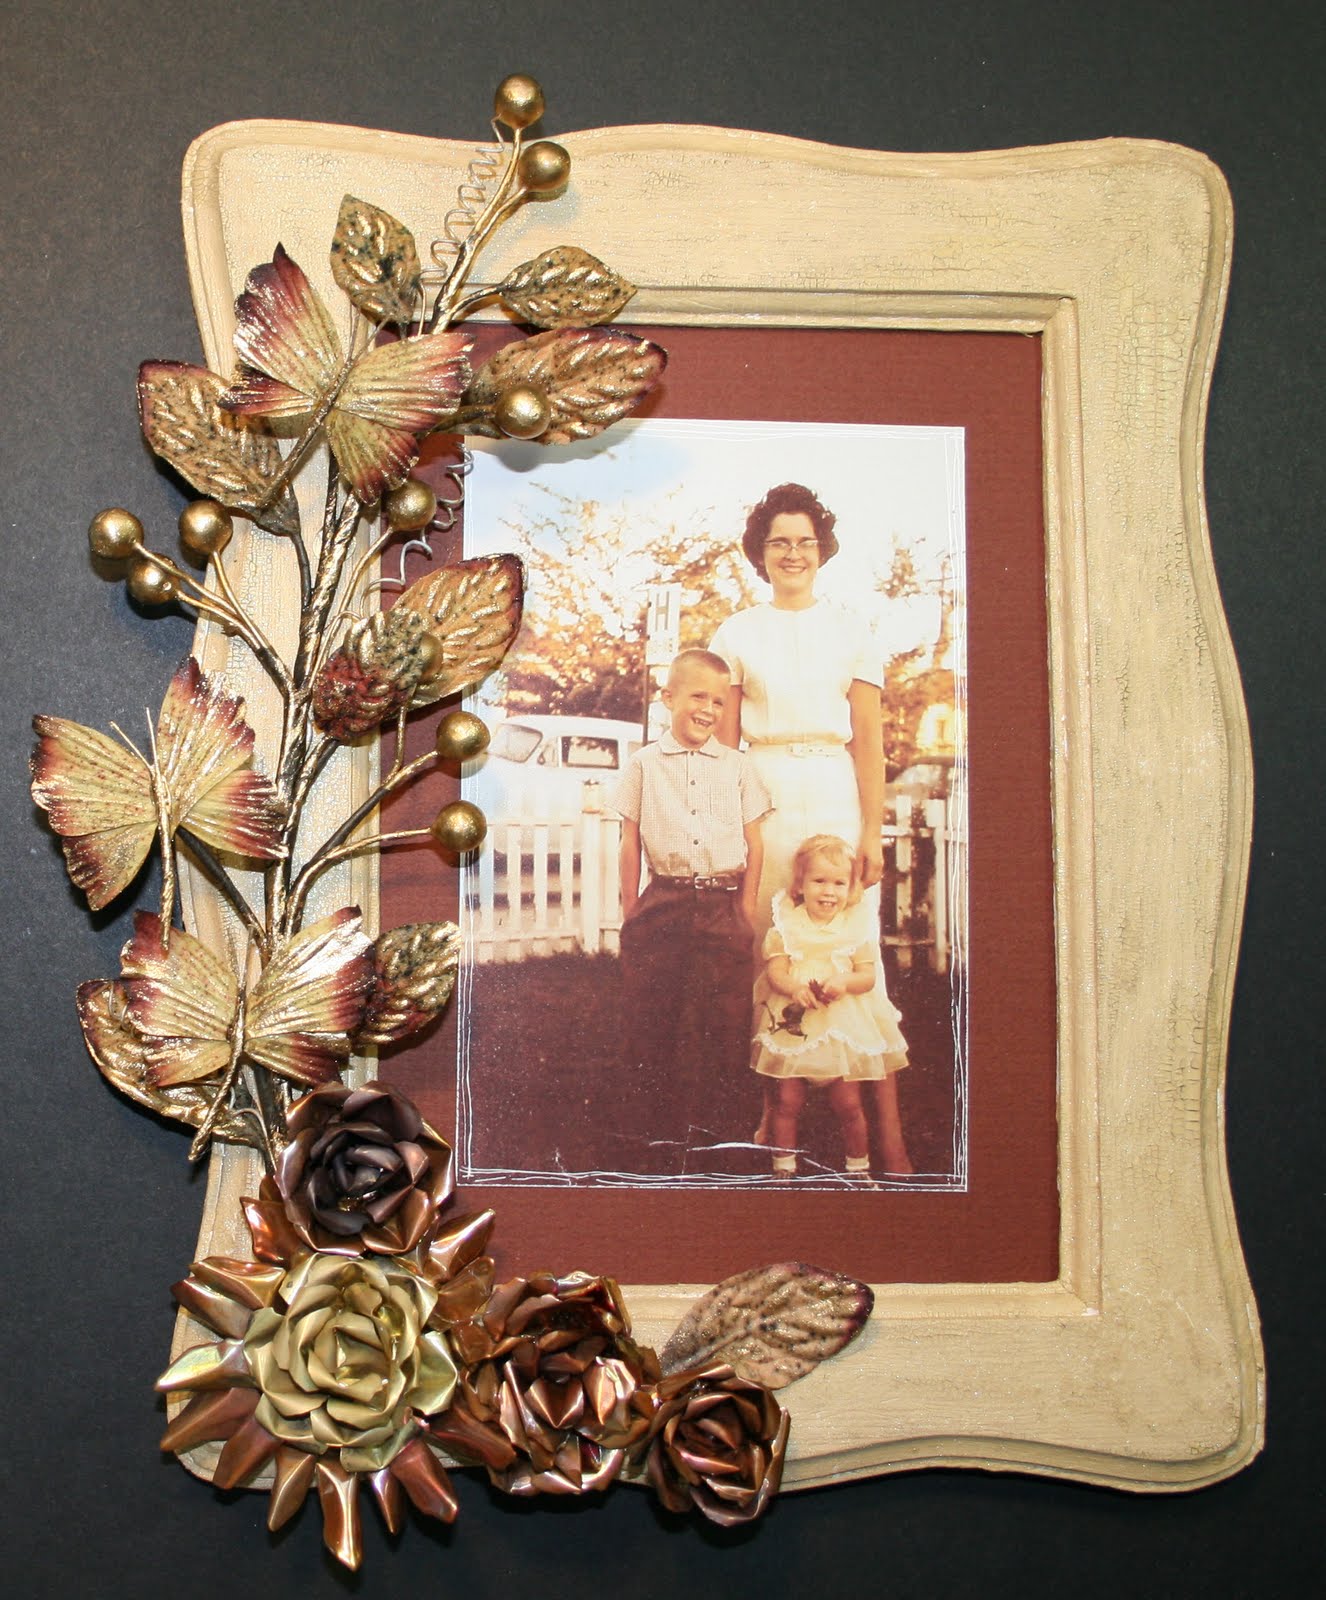
Here I used both copper and brass flowers on an unfinished frame. I painted the frame with Distress Crackle Paint in "Antique Linen". I enhanced the crackle with Distress ink in "Frayed Burlap" and sprayed it with Tattered Angels Glimmer Mist in "Wheatfield". In addition to the metal roses, I attached a Holiday Lights Butterfly Spray from Prima. I hot glued everything to the frame. The brass and copper colors go great with the photo of my Mom with my brother and I when I was about 2.


Have an awesome rest of your week!!

Laura

Saturday, May 1, 2010

NSD Give'Away Winners!!

Here are the winners from my National Scrapbook Day drawings:

The Winner of the Special Edition Glimmer Mist is:

Carol said...
Nothing special for NSD except spending a few hours with you for the class. That is always a highlight.

The winner of the Vintage Mini Album is:

Brigid said...
Hi Laura,
I'll be finishing off the My Guy album. Really enjoyed putting it together and watching your new class of course.

The winner of the Purse Mini Album Kit is:

Lexi said...
I'm hoping to finish up a couple of mini's that I have been working on and looking for some on line NSD specials.

Congrats to all the WINNERS!! Email me your info at quiltedbaglady@aol.com to make delivery arrangements!!

Thanks for joining me today!!

Laura

Gatefold Mini Dimensions

I think I put some of you into dimensions overload last night!!! Here are the dimensions. Click on the photo t0 enlarge and print. See you tonight for Part II!


Have an
Awesome
National
Scrapbook
Day!!

Laura