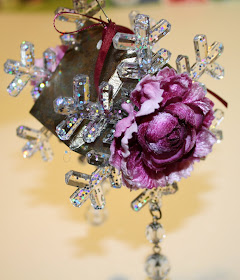
....for a PARTY!?!
Tonight is the 1ST ANNUAL NEW YEARS EVE BASH!!! I am sooo excited!....I can barely contain myself!!! I know the Barrie and Carol of Scrapadabadoo.com are CRAZY excited as well!!! We are going to have so much fun! We will be making a FAST and easy project AND giving away over 100 prizes(!!!!!) Best of all, we will be enjoying the GREAT company of our scrapping friends and family....maybe even a few SURPRISES!!!
With nearly 1000 of you RSVPing, it is sure to be a bit crazy at times! Join us tonight (even if you didn't get a chance to sign up for prizes!) over on Ustream...it's easy to join in (you don't even have to register with Ustream to watch) and it's FREE!!
CLICK HERE to go directly to my Ustream Channel. It all starts at 7pm Pacific time. (Click Here for a time convertor to get the time where you are). Get there early for the best seat! (HEE! HEE!)
WHOO HOO It's time to PAR-TEE!!!!
SEE you ALL tonight!!
Laura
Friday, December 31, 2010
Sunday, December 26, 2010
What a lovely day!
We had a delightful Christmas yesterday and I hope you all enjoyed yours as well. I actually took the entire day off from scrapping!
Today I was back at my desk working on the New Years Eve Bash project. I'm loving it! It is going to be a fun project. I am getting so excited about the New Years Eve show. We have a few surprises in the wings so you won't want to miss it!
I have been wanting to make both tall album and a horizontal album....so I can check the first of the list. At 5 1/2" x 9 1/2" it's not so mini, but it can hold a ton!! I LOVE this paper...."A Colorful Life" by DCWV. I will be putting kits up after I post this blog and will post a YouTube video as well. It is full of rich, vibrant color and fun embellishments. As always, I will also have a pattern available on Etsy (probably on Tuesday morning)
As you can see, It has lots of pockets and interactive flaps. In typical "Laura" fashion, there is lots of real estate for photo's and journalling!
On Friday, I will also have previews of a few of the upcoming projects!
More later this week!
Laura
Thursday, December 23, 2010
On the TWELTH Day of Christmas....
....I made a teeny, tiny Stocking Stuffer mini! This mini is made from a single piece of 6" x 12" paper or card stock. A few snips, a few folds and VOILA! a baby mini is born!
Score 6" x 12" piece of double sided paper along the shorter length at 2" 4" 6" 8" and 10". Score along the long length at 3".
Cut from edge to center score at 2", 6", and 10" along one side of center score and from edge to center score at 4" and 8" along other side of center score.
Check out the video for how to cut and fold.
Here's a larger version that we will be making on a future Ustream show.
I hope you have enjoyed this years Twelve Days of Christmas projects. I had a lot of fun with it!!
Happy Holidays!!
Laura
Just a Note on 12/24/10: OMG! I didn't even know the Meander Album existed until this morning when I read some of the comments on Youtube! GEEZ! I usually do my research but I didn't on this one. The Meander Album is one of those projects that has been around for years it appears...how did I miss it!! I couldn't find who originated it...if someone knows, let me know. The Meander Album is a similar concept, but cut slightly differently and makes a 3 x 3 album.
Laura
Score 6" x 12" piece of double sided paper along the shorter length at 2" 4" 6" 8" and 10". Score along the long length at 3".
Cut from edge to center score at 2", 6", and 10" along one side of center score and from edge to center score at 4" and 8" along other side of center score.
Check out the video for how to cut and fold.
Here's a larger version that we will be making on a future Ustream show.
I hope you have enjoyed this years Twelve Days of Christmas projects. I had a lot of fun with it!!
Happy Holidays!!
Laura
Just a Note on 12/24/10: OMG! I didn't even know the Meander Album existed until this morning when I read some of the comments on Youtube! GEEZ! I usually do my research but I didn't on this one. The Meander Album is one of those projects that has been around for years it appears...how did I miss it!! I couldn't find who originated it...if someone knows, let me know. The Meander Album is a similar concept, but cut slightly differently and makes a 3 x 3 album.
Laura
Wednesday, December 22, 2010
On the ELEVENTH Day of Christmas....
... I made "wax" flowers for my candles!
Similar to the "Glass" flowers I have showed you in the past (Paper flowers dipped in UTEE) these paper flowers are dipped in beeswax and attached to simple plain candles.
Start by melting the Beeswax by Ranger in your melting pot
Punch or cut out your flower petals. You can also use pre-made mulberry paper flowers or leaves. Dip them in the melted wax, allowing the excess to drain off. Let them cool. Layer the flowers by lightly heating the wax with a heat tool and place the layers then allow to cool.
To attach the dipped flowers and leaves to the candle, use your heat tool to carefully melt the wax of the candle slightly and the wax of the flower. Allow to cool and harden.
Add a ribbon bow if desired. These can be made for any season...not just Christmas!
As with any candle, use caution while burning! The paper is encased in wax, but can still burn!!
Happy Holidays!
Laura
Monday, December 20, 2010
I'm ready for 2011 to start...
...and for 2010 to be over!! My 89 year old mother-in -law fell today and broke her ankle in two places. She will have surgery on Wednesday and be home again on Thursday!! She is a tough cookie and seems well below her age, (my in-laws still go dancing every Friday night!) so I am hoping that her recovery goes smoothly. Aaaauuugghh! What next!?!
I will post my 11th and 12th Days of Christmas Projects tomorrow and Thursday as a result. They are almost ready and I really want you all to see them!!
Laura
I will post my 11th and 12th Days of Christmas Projects tomorrow and Thursday as a result. They are almost ready and I really want you all to see them!!
Laura
Sunday, December 19, 2010
What happened to my "little" boy!!....
...when did he get so BIG!?! I got to go to one of Trevor's hockey games today. He is HUGE in all his gear. (I am just past his shoulder when he is in skates!) I swear he was on my hip just a blink ago!!
I put the Gift Card Holders pattern up before I left for the game and am working on finishing the pattern and should be shipping it out very soon! As always, thank you for your patience!!
Laura
I put the Gift Card Holders pattern up before I left for the game and am working on finishing the pattern and should be shipping it out very soon! As always, thank you for your patience!!
Laura
Saturday, December 18, 2010
Gift Card Holders!
Join me this morning on Ustream to make gift card holders for your last minute gifts. I will have a pattern available for these (and a few others!) later today.
CLICK HERE to go directly to my Ustream Channel.
Laura
CLICK HERE to go directly to my Ustream Channel.
Laura
Thursday, December 16, 2010
Ustream Friday Night...
I had to change the project for Friday night. The Poinsettia sample and pattern were just too involved for me to get them done in time for class. I will be making it in the New Year as a spring mini that can be made into a colorful garden of flowers!
Because of the popularity of the Snowy Village on my blog, I decided to turn that into a class....we will be making the same village....but as a night time scene! You can do either one if you are working along during class. I will have the patterns for it up sometime tomorrow morning.
On Saturday, I have some SUPER cute gift card holders for the those last minute gifts. I will post the photo's and patterns sometime tomorrow as well.
I am making headway on getting my Christmas shopping done. Now i just need the elves to show and wrap things for me!!
See you tomorrow night!!!
Laura
Wednesday, December 15, 2010
On the TENTH Day of Christmas....
...I punched paper medallions!
As many of you know, I am a SERIOUS punch addict. I really LOVE the Martha Stewart brand ones! A couple of weeks ago, I designed the Lacy Flaps Mini Album to hightlight the MS Punch Around the Square punches. While I had a bunch of the corner punches out, I got to thinking....hmmmm....I wonder if these can work smaller than the sizes stated in the MS punch directions. Sure 'nuf! I experimented with a couple of sizes of squares and finally settled on 1 3/4" square working the best for almost all the standard size punches. For the giant sized corner punches I used a 2 1/2" square. I found it easier to turn the punch over to align the paper corner in to the punch corner (the wings don't help with the paper so small!)
Further play yielded the layered look used on this 7 Gypsies tray. I added bling and Tim Holtz buttons to the centers.
I also used the Holly punch to make medallions for a gift bag (you could make a matching tag as well!) The tiny holly squares look like little wreaths!
I also make a gift tag and an ornament for the tree!!
Looks like my punch addiction is far from over. I going to have to look at the corner punches in a whole new way....
Laura
Monday, December 13, 2010
On the 9th Day of Christmas.....
....I made a Snowy Villiage mini! this accordian style mini is made from envelopes and has removable house tags!
Start out with 3 long envelopes cut in half to make 6 pockets. Line them up and draw a gentle, curving line. Cut envelopes on the line. Attach the envelopes together with paper hinges with a bit of a gap between envelopes
For stability, add some heavish cardstock to the envelopes...make the fit snug. Again, draw a curving line (different than the first. Cut on the line. Attach to the inside back of the envelopes.
Make tags to fit the envelopes. They can be a single layer or they can be a top hinged card like I have shown. Add photo mattes.
Embellish the outside of the tags with cute little houses. Just have fun cutting the shapes...they shouldn't be perfect! Outline the the parts of the house with a fine point marker for a "cartoon"-like look.
The bottom of the house should extend over the top edge of the pocket. DON"T glue the bottom of the house down so that it can slide over the pocket!!
Add triangle trees and flocking for snow.
This would look super cute on a shelf or table!
Laura
Sunday, December 12, 2010
Page-a-Month Class
On last Saturdays Ustream class, I told everyone about the new class I have starting in January. I will be doing a six month series of classes - one Friday a month - to make a complete album including showing you how I do all the embellishing. So many of the classes I do have me showing you how to make the book itself, but not necessarily how I embellish it. This class will give us the opportunity to fully complete an album...from soup to nuts! I am planning a Heritage style of book similar to the "Life Well Lived" mini I made about my Dad. I am hoping to use the Curio paper collection from Basic Grey.
I will have kits and instructions available before the first class in January (along with more details!) and I would love to have some idea of how many of you will be interested in a kit for this project so that I know how much paper and embellishments to order. I estimate the kit to cost between $65 and $75 US and it will include all the paper and embellishments to complete the album as well as the instructions. I have posted a "poll" over on the side bar of the blog to give me some idea of how many are interested. I will have more than that number for those who start late and or decide later, but I gotta order supplies this week.
I am REALLY excited about this class series. If all goes well, we will start a different album in July (thru Dec) with two different paper/color options.
Peekaboo Christmas tags!
I have the pattern up on Etsy for the Peek-a-boo Christmas Mini Album tags that I did on Ustream on Sat. Dec. 11.
These are tons of fun to make. They can fit into mini album pockets or a paper bag album pockets. They could also be used as a page or on a 12 x 12 layout!
I am already designing more tags like these for a Peekaboo Fairy Mini for an early January class...tooo fun!!
CLICK HERE to go to my etsy shop.
We are about to build an ark around here! It is raining HARD today. They call it an "atmospheric river"! All the actual rivers in Western Washington are on flood watch...glad we live on high ground!!
Have a super week!!!
Laura
Friday, December 10, 2010
Paper Bag Mini Album Ustream class TONIGHT!!
We are making paper bag albums tonight! Any kind of paper bag should work...don't need the fancy Michaels ones! I will be showing you a very versatile way to bind them...using rings, a binding system, or the classic accordian folds. Along with the bags, you will need patterned paper and cardstock. I won't have a pattern for the album assembly but I will have one for the tags I use. They came out cuter than I expected and I can't wait for you all to get a "peek" at them! We are going to have fun tonight!! I will also have more info on the upcoming NEW YEARS EVE BLOWOUT BASH!! Woo Hoo!!
CLICK HERE to go to my Ustream Channel... SEE you there
Laura
Thursday, December 9, 2010
There is a glimmer of light...
...at the end of the tunnel! Whew!
Sarah had her post-op Dr. appointment and has been cleared for all activity. She has a minor infection in her belly button incision, but one last course of antibiotics should clear that up. She has been such a strong little girl through all of this...I am SO proud of her.
Trevor is also on the upswing...big improvements in the last few days. I am tentatively optimistic that by the time Winter Break is over he will be back on track.
I owe such big THANK YOU's to so many of you for your support, well wishes, and prayers. Each and every one was felt and hugely appreciated! This period would have been much darker without each and everyone of you! It has kept me from going off the deep end myself. It has been a rough time for our family....I feel so much for those of you who are going through worse.
I wish I could say more...I wish I could do more...but I do want to say a...
HUGE THANK YOU!!!
Laura
Wednesday, December 8, 2010
On the EIGHTH day of Christmas....
...I made a grouping of trees for a centerpiece or mantle!
Cut a bunch of die cut trees in a variety of shades of green. It would also be gorgeous in WHITE!( I used the Tim Holtz Pine Tree die)
Trim the tree trunk from all the cuts to make them into boughs. Cut up some of the boughs into smaller sections
Hot Glue the boughs to a styrofoam cone in a random fashion, scattering the colors. Fill in bare spots with smaller bough sections. The styrofoam cone will show in places. If you can't find a green cone, pre-paint a white cone with acrylic paint.
Add punched flowers or small ornaments to "decorate" your tree.
Have a great rest of your week!
Laura
Tuesday, December 7, 2010
On the 7th Day of Christmas Projects....for real!...
...I made a Christmas card holder!
This was suppose to be tomorrows project, but I moved it today and yesterdays to Monday and Monday's to tomorrow. It sounds complicated, but I know what going on... really...honest!... I do!....
This is a super quick and easy project to hold and display Christmas cards.
Start with (3) 12 x 12 sheets. Score at 4" from the bottom edge and at 1/2" on each side. Clip the 1/2" side tabs at the 4" horizontal score line.
Fold the 4" section up. Attach the 1/2" tabs to create a pocket. Fold the 1/2" tabbs to the back on the larger section and attach to add reinforcement. Add a 1" x 11" strip of chip board to the top edge for reinforcement.
Add eyelets to the pocket edges and the 4 corners. Add an edge punched accent strip to edge of pocket.
Add words of choice on small banner triangles. Use chipboard, stickers or electronically cut letters.
Add ribbon ties between letters and and pocket sides.
Tie pocket sections together at corners.
This can also be made as a message center for non-holiday times!
Laura
Monday, December 6, 2010
On the 7th Day of Christmas...
...I was running late! I will post the project tomorrow...crazy day today....kits, kids, and assorted "stuff" to deal with. Thanks for your patience... it's a cute little mini and I want to have it finished before I show it.
Laura
Laura
Friday, December 3, 2010
Winter Wonderland Ustream class tonight!
I am trying REALLY hard to have the pattern for tonight's class done before class.... it's been one of those days today. I don't want to postpone the class, so if i can't get the pattern done this afternoon, I will have it by morning.
Here is the Winter Wonderland Lacey Flap Mini Album that we will be doing tonight....
Winter White version (Kit will be available this weekend)
Mitten Weather Version (avaialble on Etsy now)
For class tonight you will need 5 sheets of double sided patterned paper or lt. weight card stock in a solid color with no texture. You will also need at least one Martha Stewart "Punch Around the Page" corner and edge punch set. You will also need additional paper/card stock to complete the album, but this will get you started.
CLICK HERE to go directly to my Ustream channel at 7pm Pacific time tonight.
Laura
Wednesday, December 1, 2010
We are home!
We got home at about 1 pm this afternoon. Sarah is very sore, but glad to be home and will recover quickly from here on out. Next up, getting Trevor back on track. Wish his was as easy a fix!
I will have the pattern for Friday's class available in the morning sometime.
Thank you all for the support and well wishes! I truly means soooo much!
Laura
I will have the pattern for Friday's class available in the morning sometime.
Thank you all for the support and well wishes! I truly means soooo much!
Laura
Tuesday, November 30, 2010
Sarah is doing GREAT!
Monday, November 29, 2010
On the 5th and 6th Day of Christmas Projects....
...I was still playing with Tim Holtz Configurations Boxes! First, made a gift box from the outer box and lid. It even comes with an acrylic "window" pane! Great for a gift of candy or a small item.
Add some ribbon or lace and some Prima flowers and...VIOLA!
Next I made ornaments from the little boxes. TOO MUCH FUN!
Here's a little greenery and some tiny candy canes...
Next a Tiny little snowman...
A floral snowflake....
and lastly, a STEAMPUNK ornament!
You have to get some of these boxes...they are so much fun!!
I will post how Sarah's surgery goes here on the blog tomorrow. THANK YOU for all your prayers and best wishes!!!
Laura